Transform Your Space: A DIY Wall Panelling GuideTransform Your Space: A DIY Wall Panelling Guide
Transform Your Space: A DIY Wall Panelling Guide
Wall paneling is a versatile and attractive method to update any room. This simple DIY renovation not only improves the beauty of your walls but also gives a distinct character to your home. Whether you’re a beginner or an experienced DIYer, this detailed guide will follow you through every step of the process, resulting in amazing results.
Why DIY Wall Panelling Is a Must-Try Home Upgrade
DIY wall panelling has become popular among homes due to its combination of beauty and functionality. DIY wall panelling offers a cost-effective way to customize your space, making it a popular choice for those looking to renovate their homes. Take your wall panelling project to the next level with
.
Benefits of DIY Wall Panelling
- Budget-friendly: Get a high-end look without overspending.
- Customizable: Tailor the design, material, and finish to match your style.
- Durability: Protects walls from wear and tear while adding texture.
- Timeless Appeal: Suits various aesthetics, from classic to contemporary.
What You Need to Start Your DIY Wall Panelling Journey
When it comes to DIY wall panelling, preparation is essential. Having the necessary equipment and materials on hand can make the process more efficient and pleasurable.
Materials Checklist
- MDF or wood panels
- Wood filler or caulk
- Primer and paint
- Adhesive or nails
Tools Checklist
- Measuring tape
- Spirit level
- Handsaw or jigsaw
- Sandpaper (medium and fine grit)
- Paintbrush or roller
How to Create DIY Wall Panelling
Enhance your home’s style effortlessly with
. Let’s dive into the step-by-step process of bringing your DIY wall panelling project to life.
Step 1: Plan and Design
Start by deciding the style of panelling you want. Popular options include shaker, grid, or vertical panels. Measure your walls carefully and sketch out your design, keeping proportions in mind.
Pro Tip: Use painter’s tape to outline the panel layout on the wall before committing to your design.
Step 2: Prep Your Workspace
- Clear the area of furniture and décor.
- Clean the wall surface thoroughly to remove dust and grease.
- Sand the wall lightly to create a smooth, adhesive-friendly surface.
Step 3: Cut and Arrange Panels
- Measure and cut your panels using a handsaw or jigsaw.
- Arrange the panels on the floor to visualize the design.
- Double-check all measurements to ensure precision.
Step 4: Secure the Panels
- Apply adhesive to the back of each panel and press it firmly onto the wall.
- For extra stability, use nails or screws to secure the panels.
- Check alignment with a spirit level after attaching each piece.
Step 5: Finishing and Painting
- Fill gaps between panels with caulk or wood filler.
- Sand the entire surface until smooth.
- Apply a primer to prep the surface for paint.
- Finish with two coats of your chosen paint color.
Elevate Your Design with Creative DIY Panelling Ideas
Experiment with Panel Styles
- Full-Wall Panels: Create a dramatic floor-to-ceiling effect.
- Half-Wall Panels: Perfect for smaller rooms or bathrooms.
- Mixed Textures: Combine wood panels with wallpaper or paint for added depth.
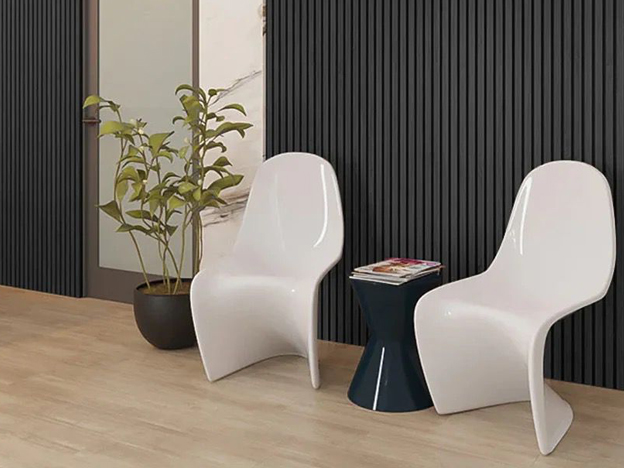
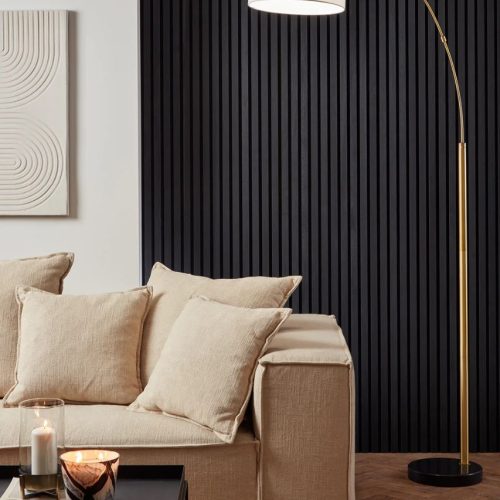
Play with Color
Dark, moody tones create a bold statement, while light, neutral shades make a room feel airy and spacious. For a unique twist, consider contrasting panel colors with the rest of the wall.
Tips for a Flawless Finish
Choose the Right Materials
Not all panels have the same qualities. MDF is budget-friendly and simple to work with, while solid wood offers a premium, long-lasting finish.
Take Your Time
Rushing through the process can result in uneven panels or messy paintwork. Work methodically and double-check your measurements at every step.
Accessorize Thoughtfully
Decorate your DIY wall panelling with items that fit its style. Consider using mirrors, wall art, or dim lighting to highlight the texture.
FAQ: Everything You Need to Know About DIY Wall Panelling
What’s the Best Material for Wall Panelling?
MDF is ideal for beginners due to its affordability and ease of use. For a more luxurious finish, opt for solid wood.
Can I Panel Over Textured Walls?
Yes, but you’ll need to sand the surface or use a backing board to create an even base.
How Long Does DIY Wall Panelling Take?
You can finish a simple project in a weekend, but more intricate designs might take longer.
Is DIY Wall Panelling Expensive?
It depends on the materials and tools you choose. MDF and basic tools make this a budget-friendly project.
Why DIY Wall Panelling Is Worth It
For a polished finish, consider using
. DIY wall panelling is more than just a design trend; it’s a creative way to infuse personality into your home. With a little effort and imagination, you can achieve a stunning, professional-quality finish that will leave a lasting impression.
Whether you’re sprucing up a single wall or transforming an entire room, DIY wall panelling offers endless possibilities to showcase your style and skills. Are you prepared to begin? Gather your tools and let your creativity shine!